Eggplant Rollatini

IMG_2796-1

I don’t like to do taste tests while I’m cooking when I follow a recipe for the first time. I prefer to wait till the dish is complete to assess and then make notes in my cookbook if necessary. The first time I was cooking this dish, though, I took a little spoonful of the filling just before I put it in the oven and was totally impressed. (To think I had only picked this dish out because I like eggplant!) The tahini makes the filling so deliciously rich and creamy. The finished result is even better with a sauce that has just the right amount of sweetness and tang. The ingredients are so clean and simple but they come together in a way that truly surprised me. The only note I made for this was to double it for next time!

Ingredients:
Filling:
2 eggplants
3 cups cooked lentils
1 tbsp miso paste
3 tbsp tahini
2 tbsp fresh minced oregano
2 tbsp fresh minced basil
2 tbsp fresh squeezed lemon juice
2 cloves garlic, minced
Sauce:
1 cup sundried tomatoes, soaked in warm water for 20 minutes
1 can diced tomatoes
1 small can tomato paste
1/4 tsp salt
2 garlic cloves
2 tbsp chopped fresh basil
1 date
2 tbsp shallot, minced

Instructions:
1. Cut off the ends of the eggplants. With flat end down on the cutting board, slice into 1/4-inch strips.
2. Heat oven to 350 degrees. Lay the eggplant strips flat on a parchment paper-lined baking sheet. Bake for 15 minutes and then set aside until cool enough to handle.
3. Meanwhile, in a medium bowl, mix together all the remaining filling ingredients. Set aside.
4. Blend all the sauce ingredients together in a blender until fully combined.
5. Spread 1 cup of the sauce on a baking dish. On a separate work surface lay each eggplant strip flat and spread 1 heaping tablespoon of filling (though if you like your rollatini thick there’s no need to hold back!). Roll up into a cylinder and and place atop of the bed of sauce.
6. Pour the remaining sauce on top and cover with aluminum foil. Bake for 30 minutes, until heated through and the sauce is bubbly.

Source: Thrive Foods by Brendan Brazier

July 4th Vegan Breakfast-for-Dinner!

IMG_2917
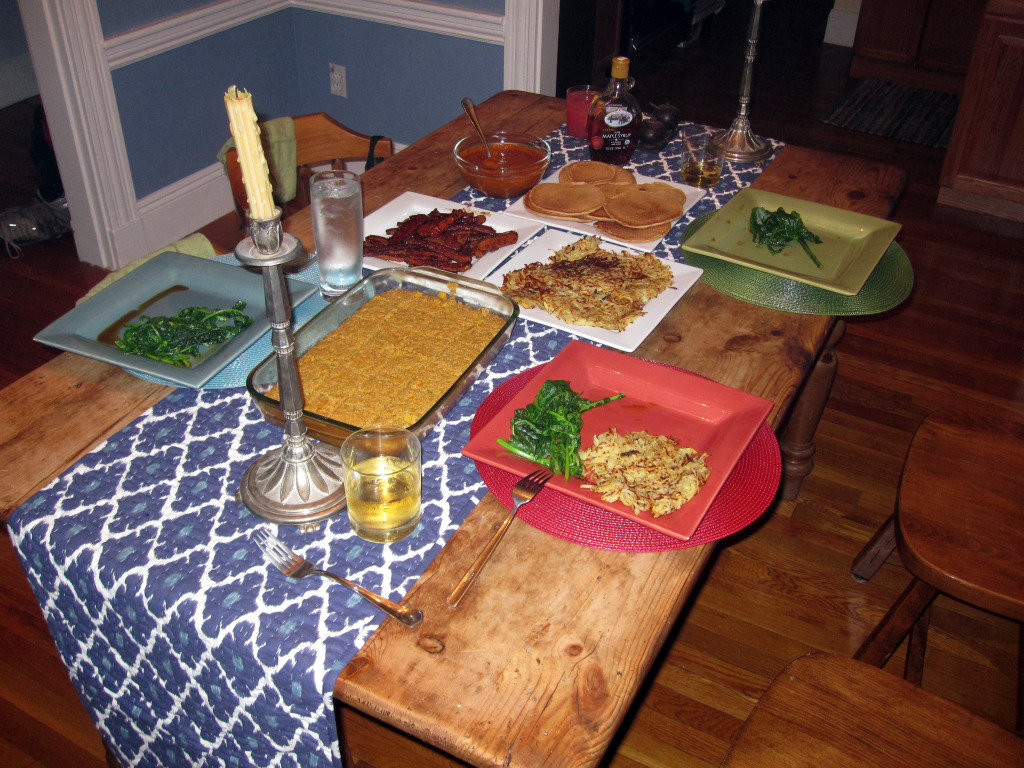
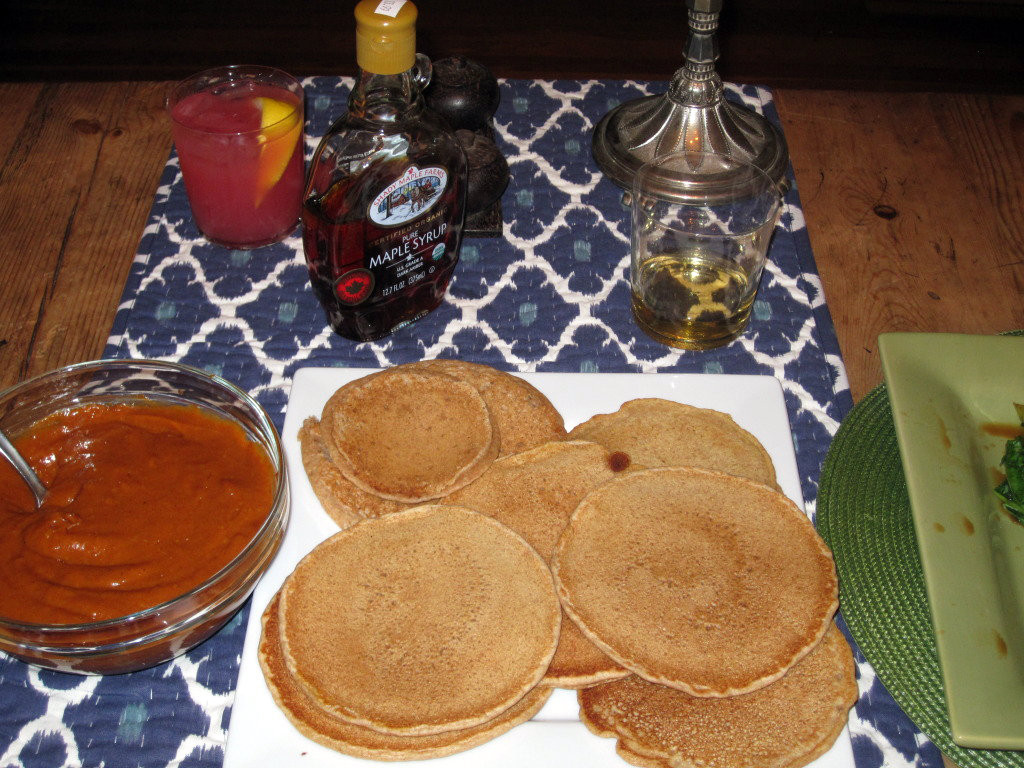
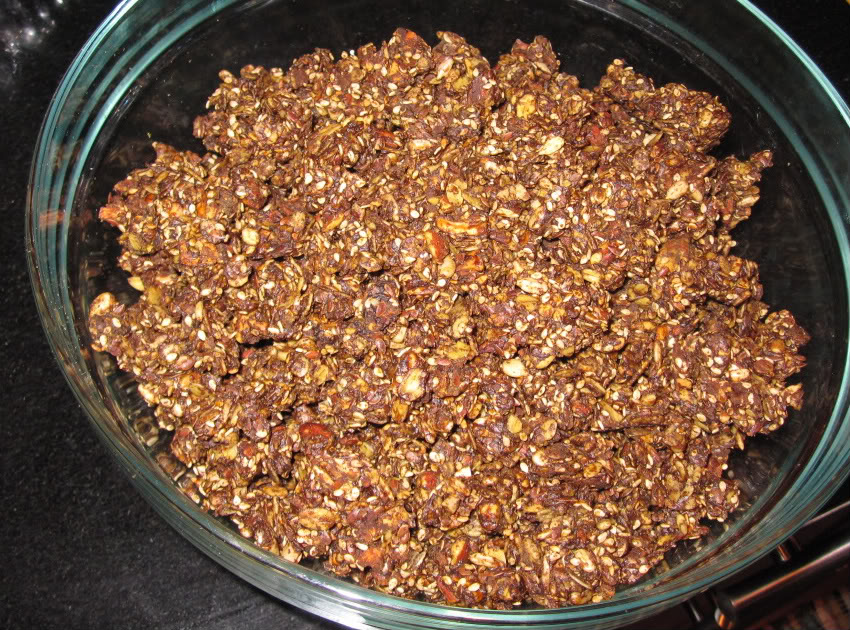
     Robert’s brother, Clint, came to visit us at our new place in Boston over July 4th and had the excellent idea to celebrate the holiday with breakfast for dinner. I loved this idea because it allowed us to serve up lots of American classics with our own stamp of independence (read: everything was vegan). Another huge plus was that all our banging around in the kitchen and chatter drowned out most of the fireworks so Gubie had his very first non-suicidal July 4th. A revolutionary evening indeed!
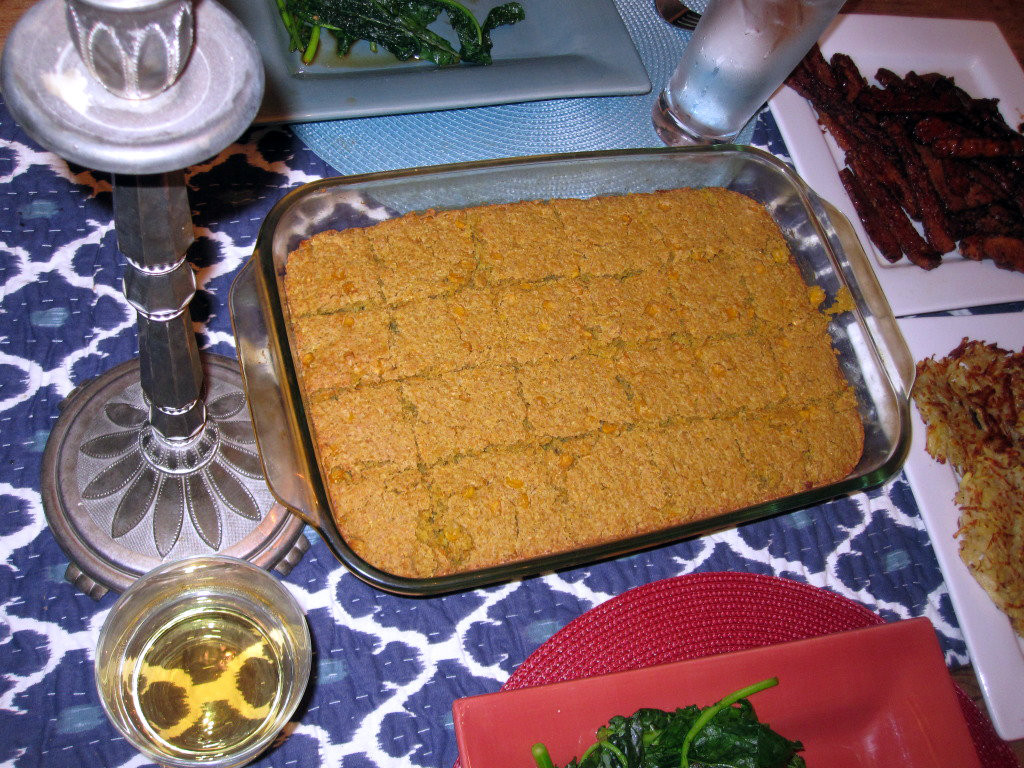
QUINOA CORN BREAD
IMG_2918
Ingredients:
1 cup quinoa
2 cups water
1 cup fresh corn kernels
1 1/4 cups cornmeal
1/3 cup spelt flour
1 tablespoon oat flour
1 tablespoon brown rice flour
1 1/4 tablespoons baking powder
1 teaspoon baking soda
1 teaspoon sea salt
1 tablespoon unrefined sugar
1 cup soy milk
1/3 cup maple syrup
1/3 cup unsweetened applesauce
1 tablespoon flax eggs (a fantastic egg substitute: place 2 parts warm water and 1 part ground flax seeds in a blender and blend at high speed for about a minute or until the mixture becomes gelatinous. Will keep, covered, in the refrigerator for up to 2 weeks.)
Instructions:
1. To make the quinoa, first toast quinoa on a dry pan over high heat for 2 minutes. Add 2 cups of water and bring to a boil. Reduce heat to low, cover, and simmer for 18-20 minutes until quinoa is fluffy.
2. Preheat oven to 350 degrees and get out a 13x9x2-inch baking pan.
3. In a large mixing bowl, combine the corn, cornmeal, flours, baking powder, baking soda, salt, and sugar. In a separate bowl, mix together the soy milk, maple syrup, applesauce, and flax eggs. Add the wet ingredients to the flour mixture and stir well to combine. Stir in the cooked quinoa. Pour the mixture into the prepared pan and bake for 30-35 minutes, or until a toothpick inserted in the center comes out clean.
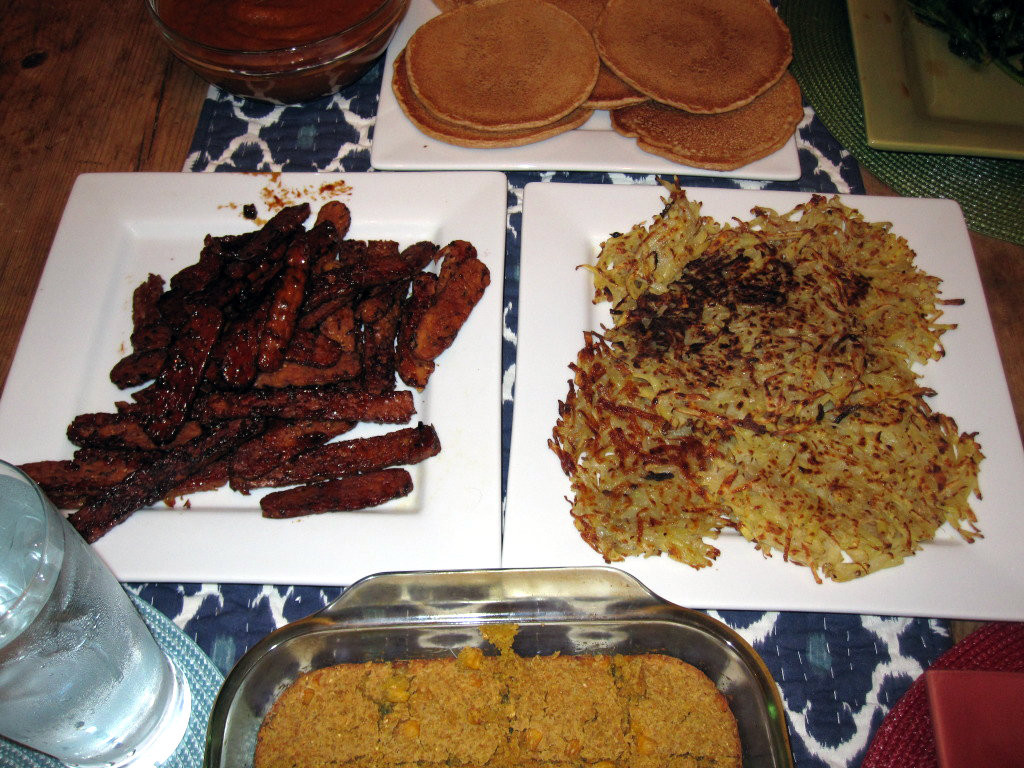
DINER-STYLE PANCAKES
IMG_2920
Ingredients:
1 1/4 cups sifted unbleached white or spelt flour (for gluten-free, use oat flour)
2 1/2 teaspoons baking powder
2 tablespoons unrefined sugar
3/4 teaspoons sea salt
1 1/2 teaspoons flax eggs (see corn bread recipe for instructions) dissolved in 1 tablespoon soy milk
1 3/4 cups soy milk
1/2 teaspoon vanilla extract
3 tablespoons canola oil, plus more for cooking the pancakes
maple syrup (optional)
Instructions:
1. In a large mixing bowl, combine the flour, baking powder, sugar, and salt. In a separate bowl, combine the dissolved flax eggs, soy milk, vanilla extract, and oil. Mix ingredients from both bowls together, stirring well to combine.
2. In a large skillet over medium heat, heat some oil. Drop large spoonfuls of batter onto the skillet, leaving room for the pancakes to expand. Cook until the bottoms are golden and bubbles are popping on the surface, about 2-3 minutes. Flip the pancakes and cook until golden. Repeat, using up all the batter.

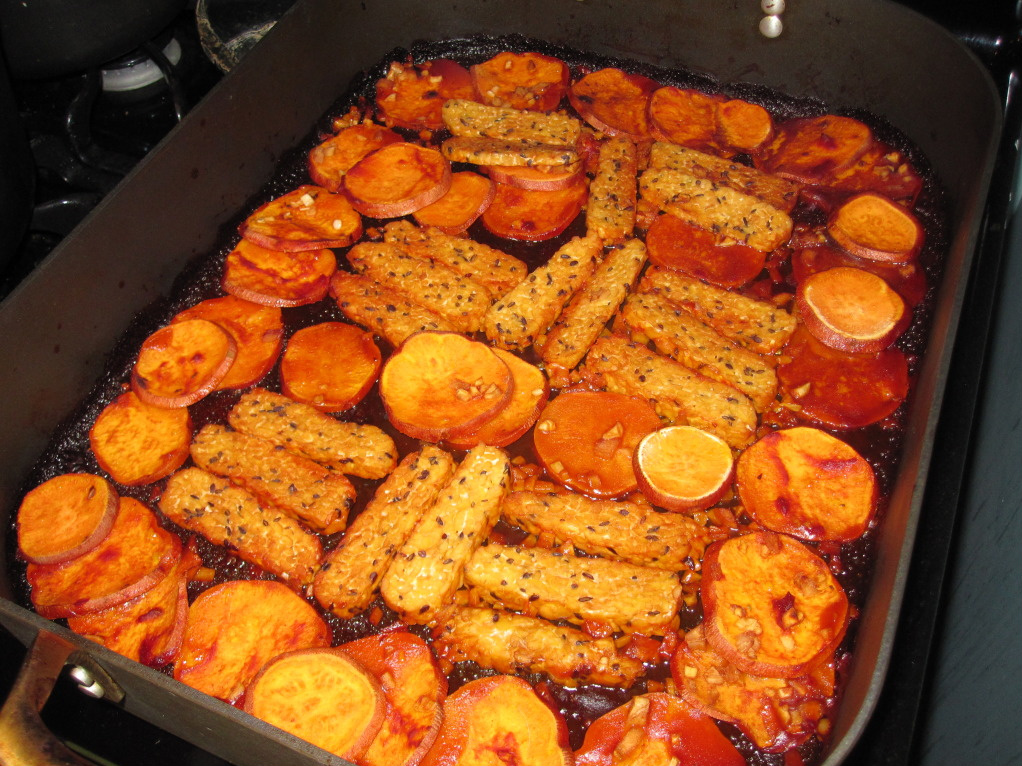
TEMPEH BACON + HASH BROWNS + HOMEMADE KETCHUP
IMG_2919
I used Colleen Patrick-Goudreau’s tempeh bacon recipe and used the remaining marinade to saute the greens. We served our homemade ketchup with the hash browns. Here’s the recipe for the hash browns:
Ingredients:
3 lbs. yukon gold potatoes, grated
3 tablespoons canola oil
Salt and pepper to taste
Instructions:
1. Heat oil in a large frying pan over medium-high heat.
2. Add the grated potatoes in loose patties or piles, no more than a half inch think. Sprinkle some salt and pepper on top. After a few minutes, check the underside for doneness. Once they are golden brown, use a large spatula to flip the patty and fry till golden brown on the other side. Repeat with all patties.
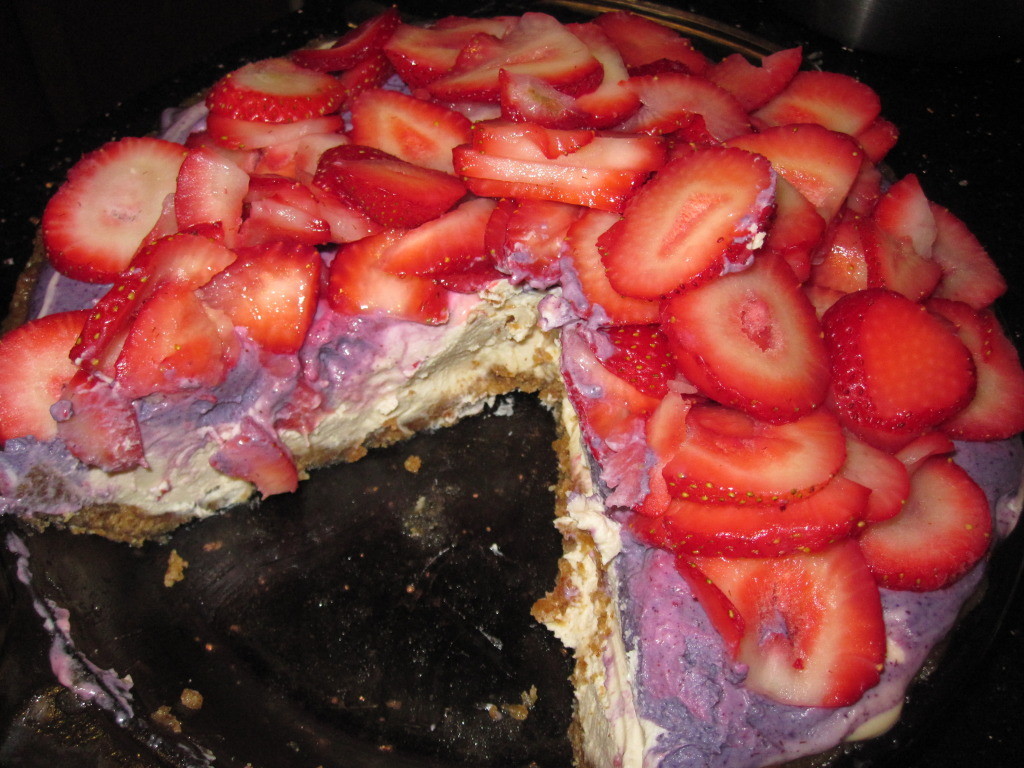
RED, WHITE, AND BLUEBERRY CHEESECAKE
IMG_2925
For this recipe I added blueberry frosting and fresh strawberries to my raw vegan cheesecake. Here’s the recipe for the frosting:
Ingredients:
1 cup raw cashew pieces, soaked overnight
1 cup water
4 tablespoons agave syrup
1 teaspoon vanilla extract
1/4 cup coconut oil, melted
1 cup blueberries
Instructions:
1. Pulse the cashews in a food processor until crumbly. Add the water, agave, and vanilla and blend until smooth. With the food processor running, stream the coconut oil in through the top until combined. Add blueberries and puree till smooth.
2. Spread on top of the cheesecake with a spatula before putting in the freezer as instructed.

Oat Coconut Cupcakes + Coconut Frosting

IMG_2885

Growing up, Robert always had coconut cake on his birthday. Last week was his birthday (and mine!) so I decided to make something similar but with my own special twists. Instead of a cake I made mini cupcakes because they are just so cute and I don’t think I’ve ever made cupcakes before. I also made them wheat-free by using oat flour instead of the typical white flour. And, as always, they are vegan, so no animals were harmed in the making of these adorable coconutty indulgences. While sleeping in a sugar coma, I woke Robert up to ask him his thoughts on the cupcakes (this is my little trick to get him to tell me what he really thinks about things). He said, “Oh wow, they were really different.” Um, excuse me? What does that mean? “They were like no cupcakes I’ve ever had but they were perfect.” Considering that he practically inhaled these cupcakes and has already requested them for his birthday next year, I’ll take that as a compliment.

Ingredients:
Cupcakes:
1 3/4 cup oat flour (you can make this yourself by whizzing up oats in the blender)
1 cup sugar
1 teaspoon baking powder
1 teaspoon baking soda
1 1/2 cup toasted coconut
1/2 teaspoon salt
1 cup coconut milk (from a can or a carton is fine)
1/2 cup canola oil
2 teaspoons vanilla extract
1 tablespoon apple cider vinegar

Coconut frosting:
1/4 cup vegan shortening (such as Earth Balance)
1/4 cup vegan margarine (such as Earth Balance)
4-5 tablespoons coconut milk
3 cups powdered sugar
1 teaspoon vanilla extract
1 teaspoon almond extract
3/4 cup toasted coconut

Instructions:
1. Preheat oven to 350 degrees.
2. Mix flour, sugar, baking powder, baking soda, toasted coconut, and salt in a medium bowl and set aside.
3. Blend coconut milk, oil, vanilla extract, and vinegar in a separate bowl. Then mix the ingredients in both bowls, whisking till just combined.
4. Fill cupcake liners 2/3 full. Bake for 15-18 minutes or until you can stick a toothpick inside the center of a cupcake and have it come out clean.
5. For the frosting, blend the margarine and shortening together till smooth. Add the powdered sugar, a little bit at a time, and then the coconut milk. Then add in the flavorings and the toasted coconut. Mix well, decorate, and enjoy!

Dark Chocolate Coconut Cookies! Rawr!

IMG_2792-1

We love our oatmeal chocolate chip cookies but we wanted to mix it up a bit and have something that would make for a healthier pre-workout snack. Well, oh my lord, these are incredible! Wow! They taste just like moist brownies. But, believe it or not, they have very little added sugar and require no baking, and include the health-promoting ingredient maca, which means we can better justify indulging in several cookies on a daily basis.

Ingredients:
Makes about 18 cookies.
(Some of these ingredients may require a visit to a health food store or the “green” section of your supermarket. Or you can use the links I’ve provided and order the ingredients online. Trust me, these are so good, it’s worth it!)
1/2 cup shredded coconut
2/3 cup coconut flour
4 tbsp cocoa powder
4 tsp maca powder
3 tbsp agave nectar
4 tbsp almond butter
1 tsp vanilla extract
12 large Medjool dates, pits removed
3/4 cup dark chocolate chips

Instructions:
1. Heat a small frying pan over low heat and add the coconut. Toast coconut until it has turned an amber color, about 1-2 minutes, stirring constantly. Remove from heat.
2. Place the toasted coconut, coconut flour, cocoa powder, maca, and agave into a food processor and start the machine.
3. Add the almond butter and vanilla extract, then one at a time, add the pitted dates and process until a crumbly dough has formed. The dough should be, well, doughy. Like a thick cookie dough. If too wet, add additional coconut flour. If too dry, add water, a little at a time, until optimal doughiness is achieved.
4. Transfer to a bowl and mix in the dark chocolate chips. Using clean hands, grab about a table spoon and squeeze and roll to form a tight ball. Flatten the ball using your palm to form a small cookie. You’re welcome!

Black Bean Burgers with Cashew Mayo

IMG_2687

The recipe for these burgers come from a cookbook by Candle79, an amazing vegan restaurant in New York City. The burgers are flavorful enough that you don’t even need toppings, but of course toppings are always great. The cashew mayo was a happy accident. We were out of veganaise so I quickly whipped something up with just a few ingredients and it was really, really good–light and creamy with a touch of saltiness. Puree 1 cup of raw cashews, 1 garlic clove, and 1 tablespoon tamari with 3/4 cup water. Cashews are such a versatile ingredient. You can use them to make anything from cream cheese to salad dressings to cake frosting. “Cashew” is also the cutest word ever. Cashew! Gazuntite.

Ingredients:
(Makes 8 burgers)
4 cups black beans, soaked overnight
1 cup peeled and diced carrots
1 cup peeled and diced onion
3/4 cup diced red bell pepper
3/4 cup diced yellow or green bell pepper
1/2 teaspoon salt
3/4 cup cornmeal
1/2 teaspoon ground cumin
2 tablespoons chili powder
1/4 teaspoon cayenne
1 cup chickpea flour (buy packaged or grind your own dried chickpeas in a blender)
1 1/2 teaspoons fresh lemon juice
1/2 cup chopped cilantro
optional: whole wheat or gluten-free buns, avocado, sprouts, sliced tomatoes
Cashew Mayo
1 cup raw cashews
1 garlic clove
1 tbsp tamari
3/4 cup water

Instructions:
1. In a large saucepan, simmer the beans in 5 cups of fresh water for 35 minutes. Drain the beans, reserving 1 cup of the cooking liquid.
2. In a large bowl, mix together the carrots, onion, peppers, salt, and cornmeal. Then stir in the cumin, chili powder, cayenne, chickpea flour, lemon juice, and cilantro. Stir in the black beans and form into patties. Add a bit of the reserved cooking liquid to the mixture to moisten if it is too dry. Or if you prefer a smoother-textured burger, blend half of the mixture in a blender until smooth and combine with the remaining mixture.
3. In a skillet, cook the burgers for about 3-5 minutes on each side. Serve with desired toppings and enjoy!
4. Puree all the ingredients for the cashew mayo in a blender until smooth.

Curry Lentil Rice Pizza

IMG_2558

This “pizza” has become a staple in our home because it’s really tasty and makes enough leftovers for several lunches. The recipe comes from Thrive by Brendan Brazier, the professional Ironman triathlete (and a vegan, of course). Brazier’s recipes are based on the concept of “high net-gain nutrition,” meaning eating foods that leave you with more energy, not less. According to Brazier, most foods in the average North American’s diet require almost as much energy to digest and process as they contain, therefore the net gain is extremely low. As a result, people feel weaker and hungrier, and their bodies are less resilient and their health more compromised. However, nutrient-dense whole foods–those foods that have not been refined and stripped of their value during processing–eliminate excess work for the body thereby leaving us with more energy, more physical resilience, and more mental clarity. It’s a simple concept that makes a lot of sense. I’d highly recommend this book to anyone interested in fitness, or health in general. Plus, the recipes are great.

Ingredients:
Crust:
3 cups cooked brown rice
3 cups cooked lentils
4 tsp curry powder
2 tsp dried basil
Sea salt to taste
Topping:
Nutritional yeast
2 yellow or orange tomatoes, chopped
2 yellow or orange bell peppers, sliced
1 medium sweet potato or 3 large carrots, thinly sliced
1 cup green onions, chopped
2 tsp oregano
2 tsp thyme

Instructions:
1. Preheat oven to 300 degrees.
2. In a food processor or by hand, combine all crust ingredients until mixture starts to ball up.
3. Lightly oil an 11-by-15-inch baking tray. Spread crust mixture evenly on tray.
4. Sprinkle nutritional yeast on top of the crust. Use as much or as little as desired (we use a lot!). Add toppings.
5. Bake for approximately 1 hour (this may vary slightly depending on the moisture content of the vegetables).

Tamarind BBQ Tempeh + Sweet Potatoes

IMG_25692

Ingredients (Serves 4):
4 cloves garlic
1 tablespoon minced fresh ginger
3/4 cup vegetable broth
2 teaspoon arrowroot dissolved in 1/4 cup water
2 tablespoons tomato paste
1 tablespoon tamarind concentrate
3 tablespoons agave or maple syrup
2 tablespoons tamari or soy sauce
1 teaspoon liquid smoke
1/8 teaspoon cayenne (optional)
1 1/2 pounds sweet potatoes, peeled and sliced into chunks or rounds
12 ounces tempeh, cut into 1/2-inch slices

Instructions:
1. Spray a casserole pan (preferably not glass) with nonstick cooking spray.
2. In a medium-size mixing bowl, whisk together all the ingredients (except the sweet potatoes and tempeh). Make sure to get the tamarind dissolved.
3. Place the sweet potatoes and tempeh in the prepared pan. Pour the sauce over them. Be sure everything is coated well, using your hands if necessary. You can bake immediately or let marinate for at least an hour to get more flavor into the tempeh.
4. When ready to bake, preheat the oven to 400 degrees. Cover the pan with tinfoil and bake for about 25 minutes.
5. Remove from the oven and toss out the tinfoil. Flip the tempeh and sweet potatoes, making sure to scrape the bottom with a spatula in case anything is sticking.
6. Bake for another 30 minutes, flipping everything once. The sweet potatoes should be tender but not mushy, and the sauce should be thickened and coating everything. Give thanks and enjoy!

Source: Appetite for Reduction by Isa Chandra Moskowitz

Apple Cinnamon Energy Bars

IMG_2331-22                       IMG_2333-12

These energy bars are a staple in our house. Robert brings two to work everyday. The recipe comes from Thrive: The Vegan Nutrition guide to Optimal Performance in Sports and Life by Brendan Brazier, the professional ironman and triathlete. Unlike commercial energy bars which provide sugary stimulation from highly-processed ingredients, these homemade bars provide real nourishment that delivers sustainable energy. We wrap them individually and store them in the freezer. They wont freeze solid (no thawing necessary) but will maintain their chewiness so they are perfect to bring along on a hot or cold day.

Ingredients:
1 small apple, cored
1 cup dried dates
1/2 up cooked quinoa
1/4 cup almonds
1/4 cup ground flaxseed
1/4 cup hemp protein
2 tsp cinnamon
1/2 tsp nutmeg

Instructions:
1. In a food processor, process all ingredients together to desired mushiness.
2. Shape into balls or bars. Wet hands with water while shaping to prevent sticking. Recipe yields about 12 bars.

Wholehearted Granola

IMG_2326-21

Can granola motivate you to get out of bed in the morning? This one sure can! Yes, it is that good. Not only will you adore the taste, but it’s packed with fiber, protein, and essential fatty acids so it’ll leave you well-nourished and well-satiated for hours. I love eating it dry while Robert usually eats it with almond milk. Either way, it’s good stuff!

Ingredients:
1 apple, diced
2 cups oats
1 cup sunflower seeds
1 cup ground flaxseed
1 cup hemp protein
1 cup unhulled sesame seeds
1 cup raw almonds, diced
3 tsp cinnamon
1/2 tsp nutmeg 1 packet ground stevia leaf (1/2 tsp)
1/2 tsp sea salt
1/2 cup molasses

Instructions:
1. Preheat oven to 250 degrees.
2. Combine all the ingredients in a bowl and mix well.
3. Spread on a baking tray lined with parchment paper. Bake for 1 hour or until toasted. Let cool and store in the fridge.

Source: I adopted this recipe from Thrive: The Vegan Nutrition Guide to Optimal Performance in Sports and Life by Brendan Brazier. The only part I changed was omitting the oil.

The Mighty Power of Sea Vegetables! (omega-3’s)

IMG_21561

All too often, when many of us decide to widen our circle of compassion to other animals, fish seem to get excluded from that circle. In my journey going vegan, fish were the last animals I stopped eating. Perhaps this is because fish aren’t enough “like us” or they aren’t “cute” or they don’t make sounds when they are in pain. I also believed, as many do, that eating fish was healthy, even necessary. This, however, could not be more wrong. Fish are NOT a health food.

How could fish possibly be healthy when they are so heavily laden with toxic chemicals that pregnant woman are advised to avoid consuming them? In addition, like all animal products, fish are high in cholesterol. Per gram, fish has comparable cholesterol levels to beef, chicken, and pork. And per calorie, fish has even higher cholesterol levels. As Dr. John McDougall describes, “feeding fish to people instead of beef, pork, or chicken, causes predictable increases in their blood cholesterol levels that are virtually the same.”

As an animal protein, the protein from fish are highly acidic in nature, making it terrible for the bones. When we consume highly acidic protein (which all animal proteins are) the body must take measures to balance out the blood and make it more alkaline. To do so, the body pulls calcium, the mineral in our body that is most alkaline, from the bones. Over time, the bones weaken as a result of this survival mechanism.

Some may now be thinking, “Well, what about omega-3 fatty acids? Don’t we need to consume fish to get those?” Absolutely not! The omega-3 fats in fish are derived from the algae or the algae-eating creatures they consume. That’s right, they get them from plants! Plus, the majority of fish consumed in the US are farmed (90 percent of all salmon!) and fed a diet of cheap fish meal which is devoid of those omega-3’s but high in antibiotics and pesticides. So there is no reason to eat fish to get the good stuff! We can go straight to the source ourselves–by eating sea vegetables!

Sea vegetables are among the most nutritionally dense foods in the world. They contain 10 times the calcium of cow’s milk and several times more iron than red meat. Sea veggies are also very high in protein and a rich source of vitamins (especially A, B, C, E, B12) and minerals (potassium, magnesium, phosphorus, and iodine). They also have some unusual and spectacular phytonutrients, including sulfated polysaccharides that bring along with them anti-inflammatory, anti-viral, and cardiovascular benefits.

This seaweed stir-fry has become a staple in our kitchen. It’s really quick to prepare and it’s so, so tasty.

IMG_2180
Ingredients:
1 tablespoon minced garlic
2 tablespoons minced and peeled ginger
1/2 cup chopped scallions
1/2 cup thinly sliced kombu, soaked in water for 15 minutes
2 stalks celery, thinly sliced
2 cups soaked and thinly sliced sea greens like arame, hijiki dulse, wakame, and alaria
1/4 teaspoon chili flakes
1/4 cup water
2 tablespoons tamari
1 cup cooked brown rice (optional)
Instructions:
1. Heat a wok or a large, deep skillet over medium high heat for 3-4 minutes.
2. Add the garlic, ginger, and scallions. Cook, stirring for about 15 seconds, then add the kombu, celery, chili flakes and sea greens. Then add the water and soy sauce, and turn the heat to high.
3. Cook, stirring constantly until the sea vegetables are tender, about 7 minutes.
4. Serve over brown rice or store, covered, in the refrigerator for up to a day. Enjoy!
Sources: Dr. McDougall’s “Fish is Not Health FoodWHFoods: Sea VegetablesColor Me Vegan by Colleen Patrick-Goudreau; How to Cook Everything Vegetarian by Mark Bittman