eHow Video: “Roasted Root Vegetable Salad with Pumpkin Seeds”

Root-Salad-2

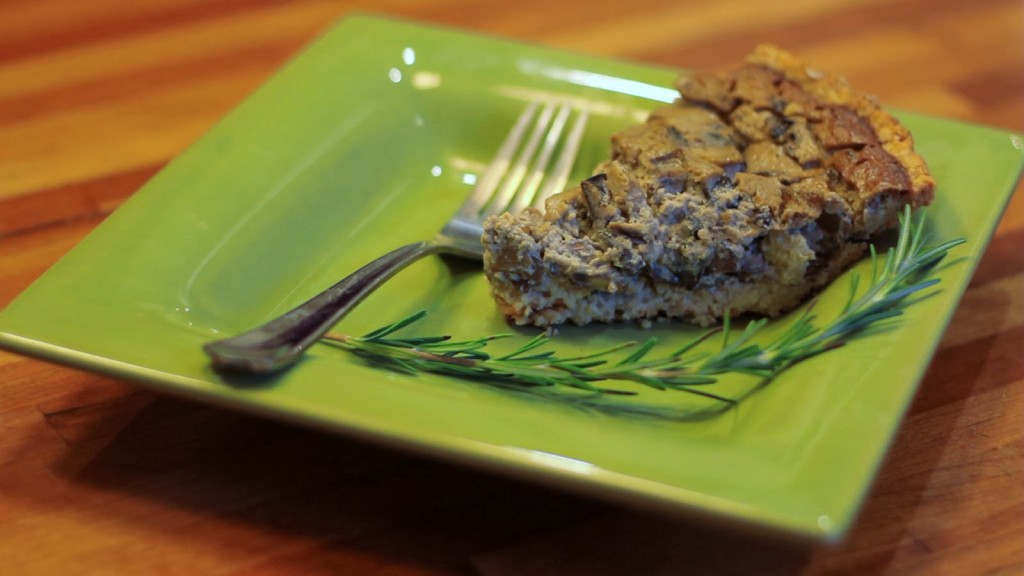
While this would, indeed, be a spectacular side salad for Thanksgiving, it almost seems unfair to make other dishes compete with this because it is such a star. Instead, I prefer to serve this hearty salad as an entree throughout the fall and winter months. For what it’s worth, Mr. Goldhouse says this is easily THE best salad he’s ever had, and one of the best dishes he’s ever had. That is high praise, indeed!
Root-Salad-1
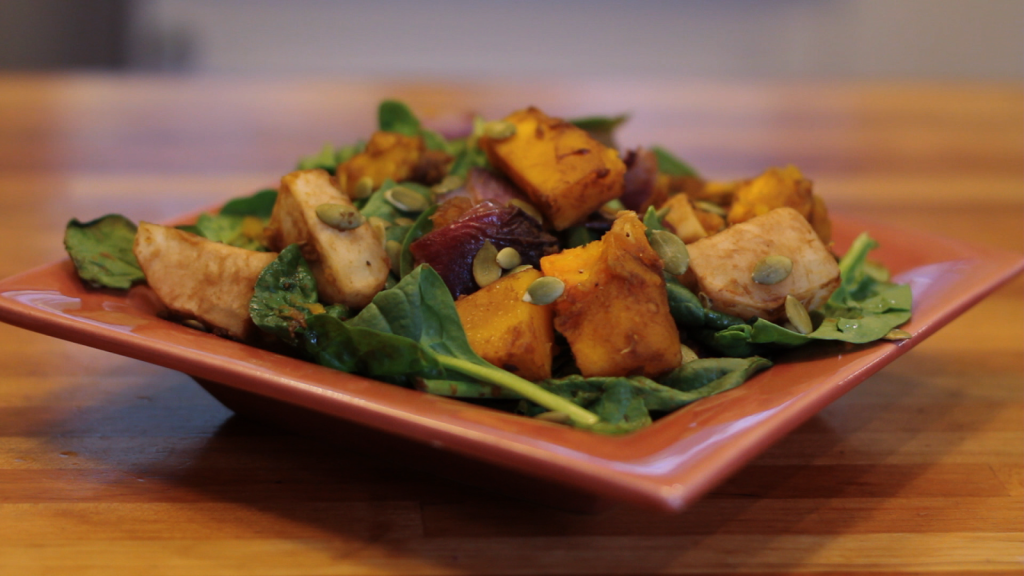
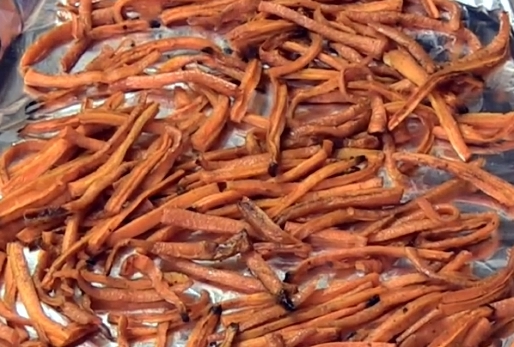
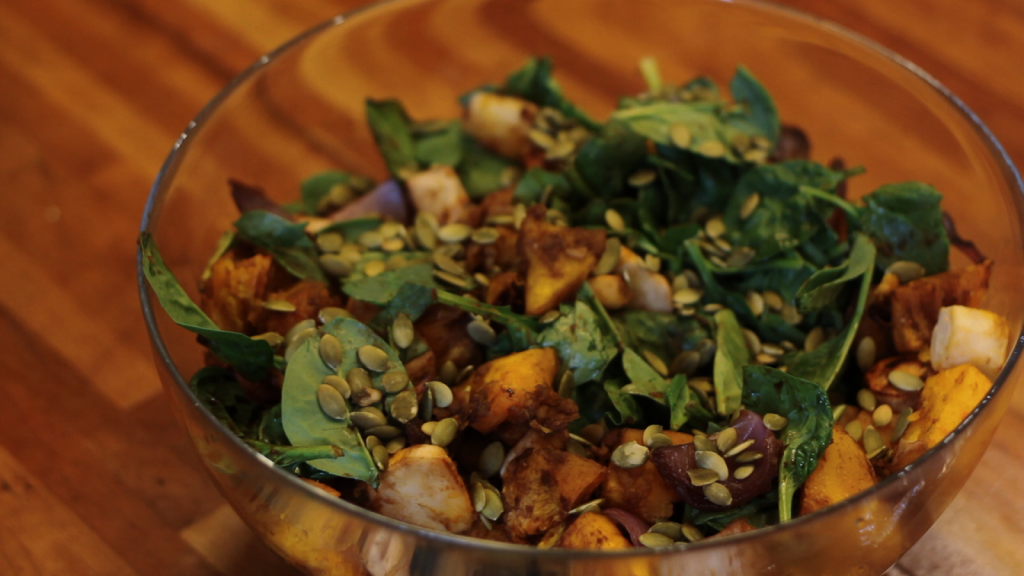
The roasted vegetables become as sweet as candy and because of their rich hues, it looks like you have gorgeous jewels on your plate. (For an even more bejeweled effect, add beets!) In addition to their beauty and deliciousness, root vegetables are also full of phytochemicals that help fight against cancer, diabetes, and heart disease.

Ingredients:
1 1/2 pound butternut squash
2 medium turnips or beets
2 medium parsnips
2 medium red onions
1 tablespoon fresh ginger
1 tablespoon maple syrup
1/2 teaspoon salt (optional)
1 tablespoon balsamic vinegar (more to taste)
fresh pepper, to taste
3-4 cups baby spinach
1/3 cup roasted pumpkin seeds (raw is fine too)

Instructions:
1. Preheat the oven to 450 degrees.
2. Peel all the vegetables and cut them into large chunks.
3. In a large bowl, toss the vegetables with the ginger, maple syrup, water, and salt if using.
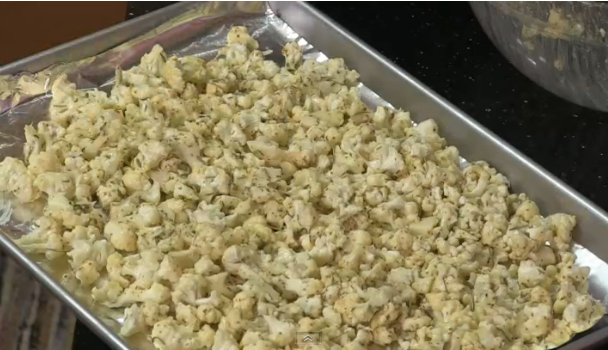
4. Spread the vegetables in a roasting pan (I recommend lining it with parchment paper) and roast for 40-60 minutes, stirring half way through, until vegetables are very tender and caramelized. A good way to tell the vegetables are done is when the onions have lost all of their crunchiness and have become sweet.
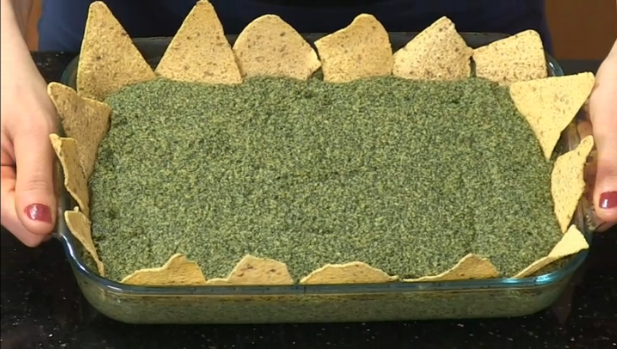
5. Place the roasted vegetables on top of the baby spinach and top with pumpkin seeds. Season with balsamic vinegar and some fresh ground pepper to taste.

eHow video: “Coconut Milk Tofu Quiche with Onions and Mushrooms”

Tofu-Quiche-2jpg

People often complain that they don’t have time to make dinner every night. Well, guess what? I don’t make dinner every night! That’s right. And yet we never get take out, rarely dine out, and my husband always has a packed lunch to take to work.
How is this possible? Ladies and gentlemen, let me give you a life-saving tip: Make dishes in large enough portions that they will cover the next few days’ meals and/or can be frozen and eaten at another time. That, my friends, is how you can eat healthfully every night without having to spend all your time slaving away in the kitchen. It’s that simple!

Tofu-Quiche-1

This quiche is a perfect example of a dish that will last for multiple meals. Plus, it’s one of those special dishes that can be enjoyed at any time of day. I love preparing it for dinner and then enjoying it again the next day for breakfast and packing it up for my husband for lunch for the next few days. Because both the crust and the filling contain herbs, each bite is wonderfully aromatic and richly flavorful. Enjoy!

Crust Ingredients:
2 1/2 cups almond meal
1/4 cup water
1 1/2 tablespoons fresh rosemary, finely chopped
1 teaspoon salt

Filling Ingredients:
2 1/2 cups cremini mushrooms, sliced
1 large yellow onion, thinly sliced
2 tablespoons balsamic vinegar
2 packages firm silken tofu
1/4 cup coconut milk (or any other nondairy milk)
3 tablespoons nutritional yeast
3 teaspoons of your favorite herbs (i.e. basil, thyme, sage, oregano, etc.)
1/2 teaspoon salt

Crust Instructions:
1. Preheat the oven to 375. In a medium bowl, combine the almond meal, salt, and rosemary. Add the water and stir until fully combined.
2. Gently press the dough evenly against the bottom and sides of a pie pan. Bake for 10 minutes or until the crust looks dry and just toasted.

Filling Instructions:
1. Slice the tofu and wrap in a few layers of paper towels to drain out the excess moisture. Set aside.
2. Saute the onions and mushrooms in balsamic vinegar until the onions are caramelized, about 10 minutes.
3. In a food processor or blender, mix the tofu, nutritional yeast, nondairy milk, and herbs till smooth.
4. Combine the tofu mixture with the sauteed mushrooms and onions and stir till fully mixed.
5. Pour the filling into the pie crust and bake for 30-40 minutes, or until the top is golden brown. Remove and let cool.

My eHow Video Series: Oven-Roasted Bell Peppers

Bell peppers get their red, orange, and yellow color from carotenoids, which provide antioxidant and anti-inflammatory benefits that can help lower our risk of cancer development and heart disease. Bell peppers are also loaded with vitamin C, which supports our immune system. Given that they also taste fantastic, why wouldn’t we want to make bell peppers a regular ingredient in our diet?

afc491e2-f7e3-49db-9584-5bf3b7f899ef_zpsde09dbe4

In the video below, I show you how to roast bell peppers in the oven. As you’ll see, it’s quite simple. Roasting bell peppers really brings out their almost candy-like sweetness. I love to make salad dressings with pureed roasted bell peppers or blend them up with my hummus, but they are also delicious in a sandwich, on top of salad greens, or as a side dish. What’s your favorite way to enjoy roasted bell peppers?

My eHow Video Series: Roasted Cauliflower With Mustard Butter

Because cauliflower is white, people often assume it’s a nutritional dud, on par with iceberg lettuce. But cauliflower is part of the cruciferous, or cabbage, family of vegetables. Other cruciferous vegetables include kale, bok choy, broccoli, and Brussels sprouts, which are more well-known as nutritional superstars. Cauliflower provides special nutrient support for the body’s detox system, antioxidant system, and inflammatory/anti-inflammatory system, all of which are closely connected with cancer development and cancer prevention. There are numerous studies linking diets high in cauliflower to cancer prevention, particularly breast, bladder, colon, prostate, and ovarian cancers. In addition, cauliflower contains a wide array of antioxidants, which also helps to lower cancer risk.

Screenshot2013-07-24at40105PM_zps932d7527
     In this video, I demonstrate what is perhaps my favorite way to eat cauliflower. There is no butter, just a smooth and buttery consistency provided by the mix of mustards. Pop the florets into your mouth and enjoy it as fun appetizer, or serve it as a delicious side dish. Either way, it won’t last long!

Ingredients:
1 (2 pound) head of cauliflower, cut into 1-inch florets
2 garlic cloves, chopped
1 teaspoon dried rosemary
1 teaspoon dried thyme
1 tablespoon dry white wine
2 tablespoons Dijon mustard
2 tablespoons whole-grain mustard
2 tablespoons water

Instructions:
1. Preheat the oven to 400 degrees F. Line a baking sheet with tinfoil. Set aside.
2. In a large bowl, mix sauce ingredients and stir until smooth. Add cauliflower and toss to coat.
3. Spoon the cauliflower evenly on the baking sheet.
4. Roast for 15-20 minutes until browned slightly. Transfer to a plate and serve.

My eHow Video Series: Crescent Spinach Dip

Have you ever looked up the ingredients in traditional spinach dip? You’ll find things like butter, mayo, heavy cream, and dairy cheese. It’s not really fair to call it “spinach” dip. “Saturated fat” dip would be more accurate.
The really sad thing is that none of these unhealthful ingredients are necessary for making a fantastic dip. We just include them because we always have. But just because we always have done something doesn’t mean we always have to keep doing it. We need not be slaves to custom or tradition or habit. I think most people would agree that custom, tradition, or habit aren’t good enough reasons to continue causing harm to ourselves or others, ESPECIALLY when there are quick and easy alternatives out there.
My version of spinach dip takes the spinach seriously. And, in addition to using a whole package of thawed frozen spinach, I also use a whole head of kale. Like spinach, kale is loaded with vitamins A, C, K and folic acid, and it’s also a rich source of calcium and iron. Kale also contains carotenoids, which are potent antioxidants with natural inflammatory properties that help prevent some cancers.

Screenshot2013-07-24at23109PM_zps0ace2f5c
     I use cashews to add a rich creaminess that we too often mistakenly think we can only get from dairy products. Plus, cashews have numerous health benefits. They are high in copper which helps defend against iron deficiency anemia, ruptured blood vessels, osteoporosis, joint problems such as rheumatoid arthritis, elevated LDL cholesterol and reduced HDL cholesterol levels, and irregular heartbeat. Because of their high antioxidant levels, nuts like cashews have been linked to lower risks of cardiovascular and coronary heart disease. For additional creaminess, I use beans, which also adds protein and even more fiber to this already fiber-rich dip. (For more on the wonderful world of beans, see here.)
Screenshot2013-07-24at34856PM_zps6b2e38e2
     This is one of my favorite dishes in this whole series. I love this recipe because it demonstrates that you can eat in a way that reflects your deepest values of health and compassion AND feel like you’ve died and gone to heaven because it tastes so good. For me, the beauty of being vegan is that we can have both!

Ingredients:
16 oz. organic frozen spinach, thawed
1 bunch kale, chopped
1/2 cup raw parsley
1 cup raw cashews, soaked in warm water about 20 minutes
3 cloves of garlic
1/4 cup lemon juice
2 Tbsp apple cider vinegar
1 tsp sea salt
5 Tbsp Nutritional Yeast Flakes
1-15 oz can white beans
(optional: Daiya cheese)

Instructions:
1. Add all your ingredients (except beans and cheese) to a food processor or blender. Blend until smooth.
2. Pulse in the beans.
3. Pour spinach dip into a heat-safe serving dish. Add the Daiya cheese on top if using and place in a 350 degree oven for 15 min.
4. Serve warm with veggie sticks, bread squares and rice crackers.

My eHow Video Series: Light, Baked French Fries (Carrot Fries!)

I absolutely adore carrots. I probably eat about 10 big carrots a day. Some might say I’m obsessed. I’m actually pretty sure the people at my food co-op think that because recently one of the cashiers said he was gathering up his nerve to ask me on behalf of himself and his co-workers why I buy so many. The answer? I just like them. A lot. They are so beautiful and so crunchy. Their flavor is earthy and complex, yet also delicate and subtle. And they are so versatile. I mean, you can eat them with everything! Why in the world people eat potato chips when they could be eating carrots is beyond me.
And if you’re wondering if my skin is orange, it’s not. But I do have a healthier glow. Since beginning my mad love affair with carrots, I get asked all the time if I’ve just been on vacation because I look tan. In fact, this happens so frequently that my husband started getting jealous and now he juices carrots for breakfast. Ha! I eat mine whole, though. Because I am hard core like that.
Anyway, back to this video. We all know that the best way to make French fries lighter is to bake them rather than fry them. But, can we go further? Is there a way to make baked French fries even more healthful?
Why, yes! There is!

b88f668c-5aa9-4578-baa9-10a07bd20be5_zpsbc25b248

Use carrots, of course!
Because carrots are so sweet and flavorful on their own, you’ll find that you don’t really need to douse them with salt. And while you certainly could dip them in ketchup, you may not even want to because they taste so good on their own. This recipe is so simple, and it’s obviously healthier alternative to traditional French fries. And needless to say, it is wonderfully delicious.

My eHow Video Series: Dip for Sweet Peppers (Triple ‘S’ Dip)

This dip is a guaranteed hit at any social gathering; people just can’t seem to get enough of it! Eating it with sweet peppers is not only tasty, but also incredibly healthful since bell peppers are good for our hearts, our immune systems, our eyes, and our skin.

f4198df3-702d-433b-90b3-51573d3a5f16_zps35d751b9

As I mention in the video, I call this dip the “Triple ‘S’ Dip” because it’s salty, spicy, and sweet. Unfortunately, the part where I add the sweetness– 2 tablespoons of maple syrup– was mistakenly cut from the video. Be sure to add that in to get the full mouthwatering trifecta of flavor.

Ingredients:
1/2 cup almond butter (or peanut butter)
3 tablespoons tahini
1/4 cup tamari (or soy sauce)
2 tablespoon maple syrup
1 tablespoon apple cider vinegar
2 cloves garlic
1 tablespoon fresh ginger
1/4 teaspoon cayenne pepper
1/3 cup water

Instructions:
1. Blend all the ingredients together and blend till smooth.
2. Serve with bell peppers.

My eHow Video Series: Tomato Puree-Based Salad Dressing

What are antioxidants and why do we want them?
Antioxidants protect your cells from the damage caused by unstable molecules called free radicals. Free radicals can lead to heart disease, cancer, cognitive decline, and other diseases, so we very much want the protection of antioxidants. Fruits and vegetables are loaded with antioxidants which is why consuming them as often and as much as possible is one of the very best things we can do for our health.

0501161e-4199-425a-a237-334a2b19b6f3_zps78ace062

Lycopene is an antioxidant in tomatoes. In fact, it’s what gives tomatoes their red color. Scientific studies show that lycopene helps prevent lung, stomach, and prostate cancer. It also helps reduce LDL cholesterol and lowers blood pressure. In this video, I show you not only how to make a delicious salad dressing but I’ll also explain how to get the most lycopene bang for your buck. Woo hoo!

Tomato Puree-Based Salad Dressing — powered by ehow

My eHow Video Series: Sweet Potato Puree Smoothie

Who doesn’t love sweet potatoes? They are the candy of the vegetable kingdom. And that means they are a wonderful ingredient to put in smoothies!

791041d7-7663-49d8-84cc-b7d6aea8148f_zpsc6a6ca4d

Athletes and body builders ought to take note. Sweet potatoes are an incredibly rich source of carotenoids, powerful antioxidants that aid with muscle cell recovery and help promote muscle growth. This sweet potato puree smoothie makes an ideal post-workout recovery drink. I also think it’s great for breakfast, and even dessert! Watch and enjoy 🙂


Sweet Potato Puree Smoothie — powered by ehow

Ingredients:
1/3 cup pureed sweet potato (I use canned)
1 banana
3 medjool dates
your favorite plant-based milk
dash of cinnamon
Instructions:
1. Blend!


My eHow Video Series: Sesame Eggplant Dip Recipe

     In this video, I demonstrate my recipe for baba ghanouj, a Middle Eastern dish made with roasted eggplant and tahini. I am a huge eggplant fan, so baba ghanouj is naturally one of my favorite dishes in the world. If you like the flavor of hummus, you’ll most likely love baba ghanouj. It’s basically hummus’s more exotic and dramatic big sister. Like hummus, there’s lots of garlic, creaminess from tahini (sesame paste), earthy spices, and usually lots of olive oil.

SesameEggplantDip_zps0de50fbe

      In my recipe, I omit the olive oil and rely on the tahini alone to provide the fat and butteriness, and you’ll see it does the job just fine. I also leave the skin of the eggplant on, which is not typical of most baba ghanouj recipes, unfortunately. Eggplant skin is rich in nasunin, a potent antioxidant that protects cell membranes from damage.

     You can enjoy baba ghanouj with pita, veggies, spread on a sandwich or just by itself. Watch and I think you’ll find it becomes a favorite of yours, too.


Ingredients:
1 large eggplants (totaling 2 lbs)
2-3 tablespoons roasted tahini (sesame paste)
1-2 garlic cloves, finely chopped
1 teaspoon ground cumin
2 ½ tablespoons lemon juice
Salt and cayenne pepper to taste
1 tablespoons chopped parsley

Instructions:
1. Preheat oven to 400°F. Poke the eggplants in several places with a fork. Cut the eggplants in half lengthwise and place on a baking sheet, cut side down, and roast until very tender, about 35-40 minutes.
2. Remove from oven and allow to cool for 15 minutes.
3. Remove the eggplant skin and scoop flesh into a large bowl and mash well with a fork.
4. Combine the eggplant, minced garlic, tahini, garlic, cumin, lemon juice, the salt, and a pinch of cayenne. Mash well. You want the mixture to be somewhat smooth but still retaining some of the eggplant’s texture.
5. Allow the baba ghanouj to cool to room temperature, then season to taste with additional lemon juice, salt, and cayenne. If you want, swirl a little olive oil on the top. Sprinkle with fresh chopped parsley. Serve with pita bread, crackers, toast, sliced baguette, celery, or cucumber slices.